February 25, 2016

HOW TO: Play a YouTube Video Inside an iPhone Device Image

Quick intro

This guide explains how to easily display a YouTube video inside an iPhone frame. The result will look like in the demo video on the right-hand side (play the video to see how it works).

The process described here also works for other devices, such as iPad, Apple Watch, MacBook computers, Samsung Galaxy devices and many others.


How-to Guide


1 Create a new iPhone demo
  • First sign in or sign up for a free account on AppDemoStore.com
  • Create a new demo by clicking the button "Create Demo"
  • Select an iPhone frame (iPhone 7, iPhone 7 Plus, iPhone 6, etc.) from the device frame gallery and click "Save"


2 Add a screen

Once in the Demo Editor, the first thing you'll have to do is to add a screen. To do this, click the Plus button then either Upload Screenshots or Add Empty Screen.

Uploading a screenshot is useful when the video (which will come on top) is smaller than the iPhone frame. Also, the image you upload will appear as the demo thumbnail in the gallery or when sharing the demo.


3 Embed the YouTube Video
  • Add a video control to the screen, by clicking the "Add Video" icon
  • Insert the YouTube video link as showed in the image. The video will display immediately
  • Drag the corners of the Video control to position it accordingly
  • Click the "Preview" button and if everything is fine save the demo


4 Embed the demo (video + frame) into your website

To be able to share the demo, you'll have to change its privacy level from private (the default) to public. To do this, click Settings -> Visibility and select the

public

option.

Now you can copy the embed code and paste it into your website or blog. To find the embed code: on the Demo Page click the Share option and then the Embed tab.

When embedded, the demo video will look like in this page.


February 18, 2016

HOW TO: Demo your Windows App in the Browser

Show your Windows App in style

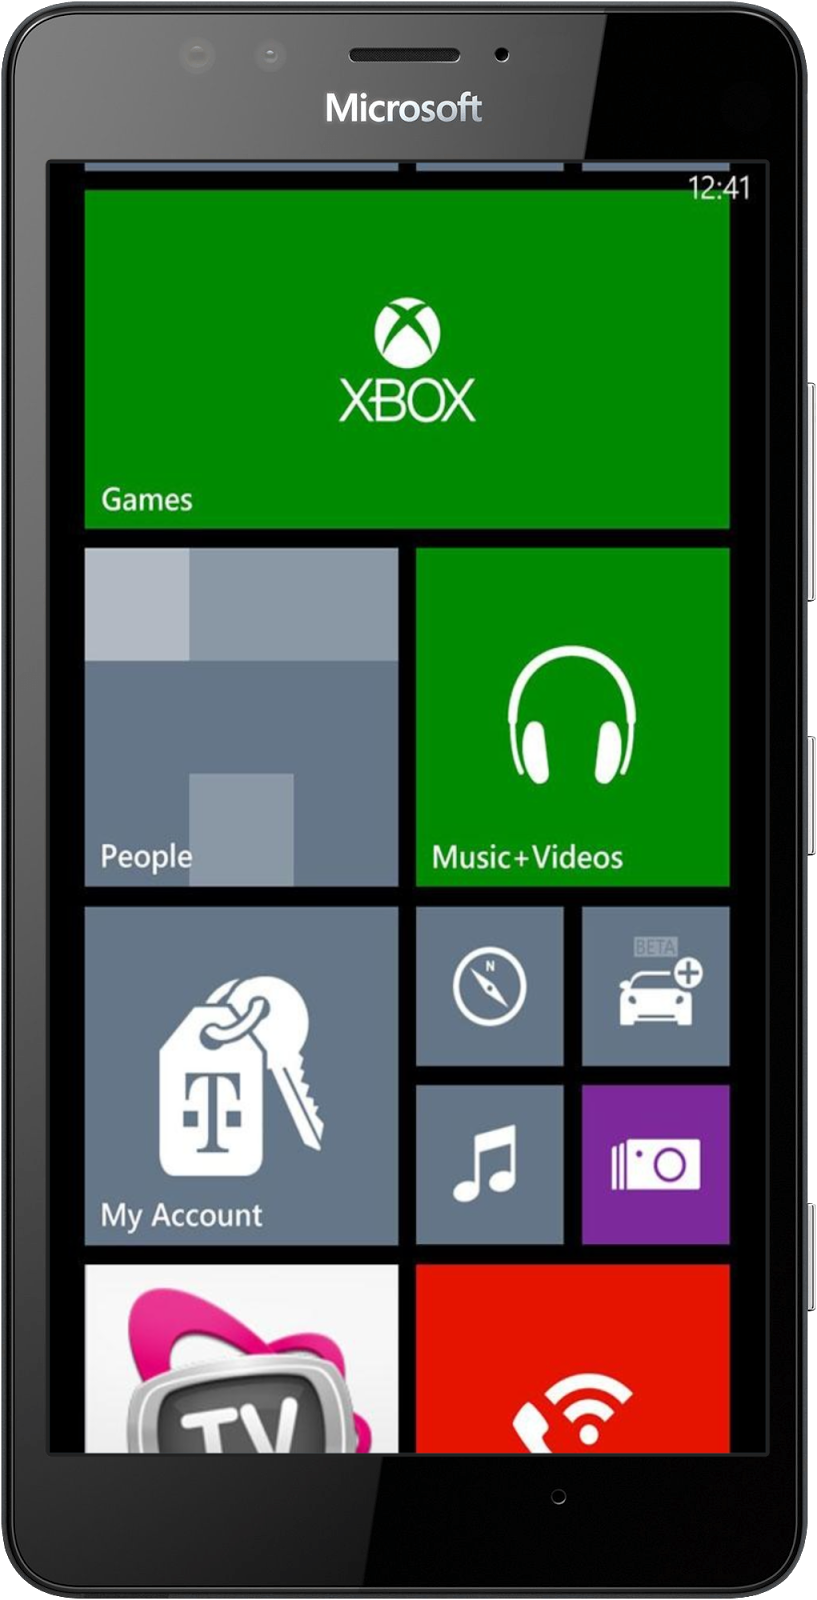
This article explains how to easily create a clickable demo or tutorial of a Windows app, to be used for promotion or knowledge transfer. The method proposed here is easy and fast, requires no technical skills and it is based on app screenshots. The result is an HTML-based app demo that can be embedded in a website or blog, installed on mobile devices or used in presentations.

1Decide for the scenario you want to show in the demo

One of the best scenarios is showing your potential users how the app solves one of their problems.

2Take screenshots of this scenario, screen by screen

To take screenshots on a Nokia Lumia 925, press the Power Key and the Start Key at the same time. You will find the screenshots in Photos > Albums > Screenshots. For other Windows devices search the Windows Support Database for "take a screenshot on ...".

3Sign up to www.AppDemoStore.com

You can sign up from your desktop or mobile device. Once signed in, you will be directed to "My Demos" page.

4Create a new demo and Upload the app screenshots to it

In the section "My Demos", click the "Create Demo" button. Select a Windows Phone frame (you can find the latest Windows Phones in the category Phones > Microsoft). The frame will be visible when the demo is viewed on a computer and not visible when viewed on a mobile device. The frame can be changed later.

To upload the screenshots click the button "Upload Screenshots" and select the files from your disk. Multiple file upload is possible, but you can upload a maximum of 10 screenshots at once. To upload more screenshots, just use the button "Upload Screenshots" several times.

Scrollable Screens: To create scrollable screens, just upload a long image and then set its property "Image Layout" to "scroll". More details here.

5Add interaction, animations and annotations.
  • Use the "Hotspot" control to add interaction between your screenshots. You can choose the transition effect between screens (slide up/down, fade). More details here.
  • Use the "Textbox", "Callout" and "Link" controls to add annotations, explanations, auto-typing and links.
  • Use the "Timer" control to simulate loading effects or show a screen for a limited time (e.g. splash screen).
  • Use the "Arrow" control to add customizable arrows. More details here.
  • Use the "iFrame" control to embed webpages in your demo.
  • Use the "Image" control to add small images on top of the screenshots.
  • Use the "Video" control to embed a YouTube video or a video stored on a server. More details here.
  • Use the "Sound" control to upload audio files or provide a text to be spoken with our Text-to-Speech functionality. More details here.
  • Use the "User Input" control to let users type information into a field that is carried over to the next screens. More details here.


The final demo or tutorial is HTML-based and runs in any desktop or mobile browser.


Image generated on PicApp.net

Common use cases for your Windows app demo/tutorial
  • Share the link to your demo via Email or social networks.
  • Embed demo in your website or HTML email.
  • Embed the demo into your Facebook Page. Learn how to do this here.
  • Embed demo in your app. Learn how to do this here.
  • Download your demo as an HTML, ZIP or APK or PDF.
  • Capture leads and feedback with your demo.
  • Get in-depth demo analytics such as where did the user click, interaction flow, exit screens, etc. More details here.
  • Use it as a starting point for generating a demo video for your app. More details here.

February 16, 2016

HOW TO: Demo your Nexus App in the Browser

Show your Nexus App in style

This article explains how to easily create a clickable demo or tutorial of a Nexus app, to be used for promotion or knowledge transfer. The method proposed here is easy and fast, requires no technical skills and it is based on app screenshots. The result is an HTML-based app demo that can be embedded in a website or blog, installed on mobile devices or used in presentations.

1Decide for the scenario you want to show in the demo

One of the best scenarios is showing your potential users how the app solves one of their problems.

2Take screenshots of this scenario, screen by screen

To take screenshots on a Nexus 9 device, press Power and Volume Down keys at the same time. When you hear a camera shutter sound effect, the screenshot is ready.

3Sign up to www.AppDemoStore.com

You can sign in from your desktop or mobile device. Once signed in, you will be directed to "My Demos" page.

4Create a new demo and Upload the app screenshots to it

In the section "My Demos", click the "Create Demo" button. Select a Nexus frame (you find the Nexus tablets in the category Tablets and the Nexus Phones in the category Phones —> Google). The frame will be visible when the demo is viewed on a computer and not visible when viewed on a mobile device. The frame can be changed later.

To upload the screenshots click the button "Upload Screenshots" and select the files from your disk. Multiple file upload is possible, but you can upload a maximum of 10 screenshots at once. To upload more screenshots, just use the button "Upload Screenshots" several times.

Scrollable Screens: To create scrollable screens, just upload a long image and then set its property "Image Layout" to "scroll". More details here.

5Add interaction, animations and annotations.
  • Use the "Hotspot" control to add interaction between your screenshots. You can choose the transition effect between screens (slide up/down, fade). More details here.
  • Use the "Textbox", "Callout" and "Link" controls to add annotations, explanations, auto-typing and links.
  • Use the "Timer" control to simulate loading effects or show a screen for a limited time (e.g. splash screen).
  • Use the "Arrow" control to add customizable arrows. More details here.
  • Use the "iFrame" control to embed webpages in your demo.
  • Use the "Image" control to add small images on top of the screenshots.
  • Use the "Video" control to embed a YouTube video or a video stored on a server. More details here.
  • Use the "Sound" control to upload audio files or provide a text to be spoken with our Text-to-Speech functionality. More details here.
  • Use the "User Input" control to let users type information into a field that is carried over to the next screens. More details here.


The final demo or tutorial is HTML-based and runs in any desktop or mobile browser.


Image generated on PicApp.net

Common use cases for your app demo or tutorial
  • Share the link to your demo via Email or social networks.
  • Embed demo in your website or HTML email.
  • Embed the demo into your Facebook Page. Learn how to do this here.
  • Embed demo in your app. Learn how to do this here.
  • Download your demo as an HTML, ZIP or APK or PDF.
  • Capture leads and feedback with your demo.
  • Get in-depth demo analytics such as where did user click, interaction flow, exit screens, etc. More details here.
  • Use it as a starting point for generating a demo video for your app. More details here.

January 29, 2016

HOW TO: Test your Website or App on Mobile Devices in the Browser

This article presents 3 simple ways to test your website or web app on different mobile devices, in the browser. The three testing options described here are: Safari's Responsive Design Mode, Chrome's Developer Mode and AppDemoStore's Online Simulator.

1 Safari's Responsive Design Mode


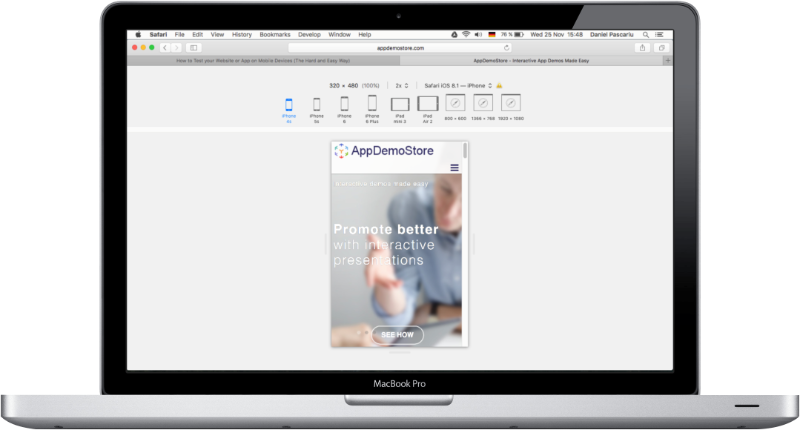
The Responsive Design Mode in the latest Safari version (9.0.1) lets you view how a website displays on different devices: iPhone 4s, iPhone 5s, iPhone 6, iPhone 6 Plus, iPad Mini 3, iPad Air 2, 800 x 600, 1366 x 768 and 1920 x 1080.

To access it click Develop in the Safari upper menu and select Enter Responsive Design Mode. Once you are in the Responsive Design Mode, the browser screen will look like in the image above.


2 Chrome's Developer Mode


To access Chrome's Developer Mode follow these steps:

  • Click View in Chrome's upper menu and select Developer —> Developer Tools from the list.
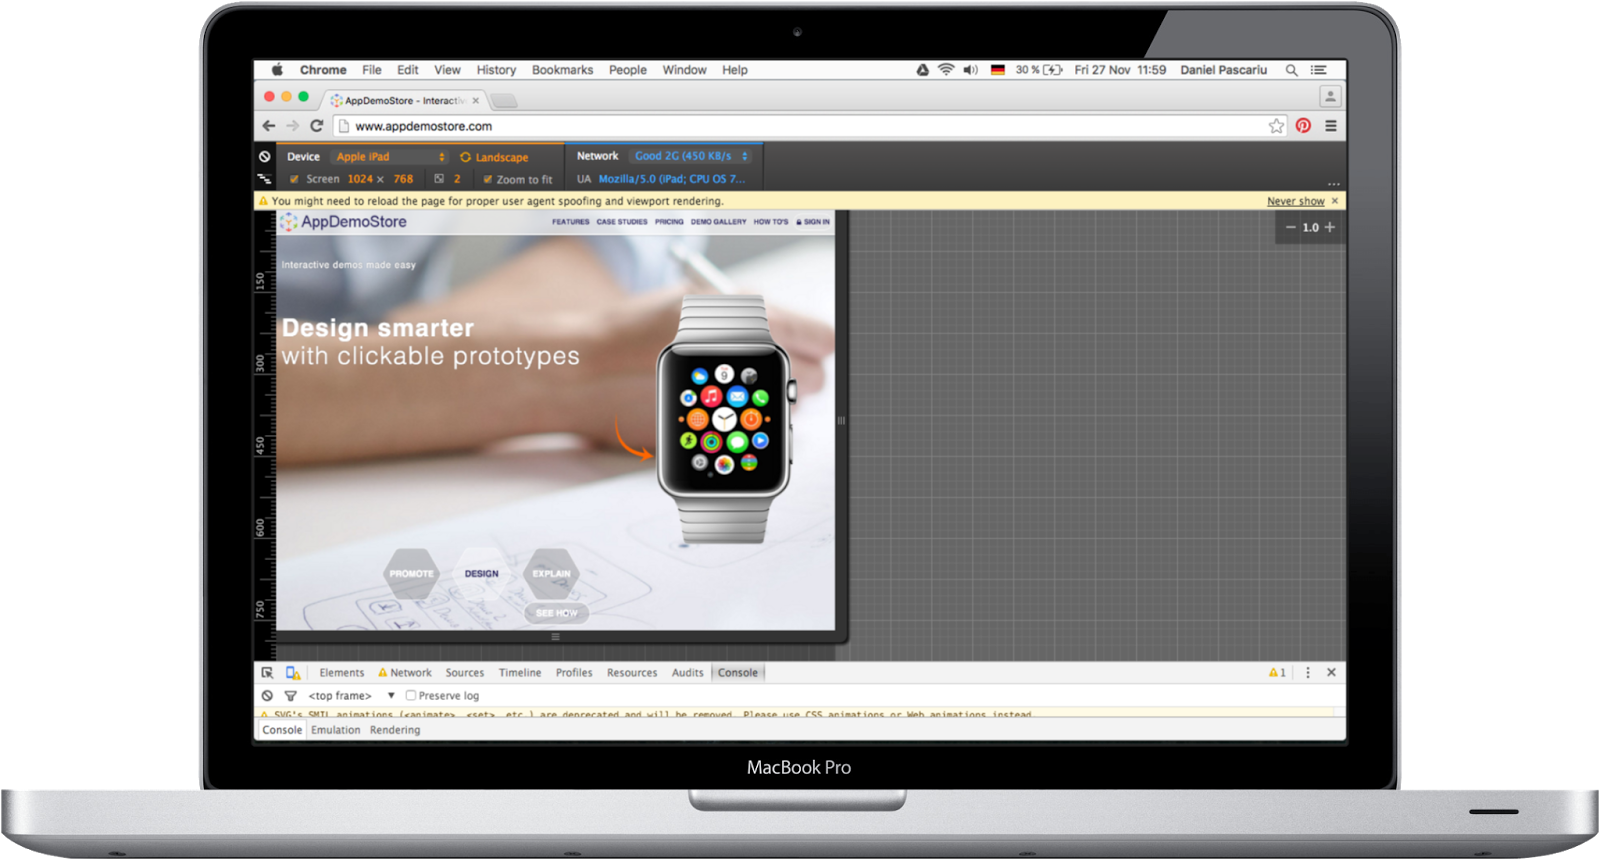
  • In the Developer Console (that opens at the the bottom of the page) click Toggle Device Mode (the small device icon in the top-left of the console window).
  • The Device Mode looks like in the image above and allows you to test your website or web app on different devices.

Advantages of Chrome compared to Safari:

  • More devices: Amazon Kindle Fire, Apple iPad Mini, iPhone 4, 5, 6, 6 Plus, Blackberry PlayBook and Z30, Google Nexus 4, 5, 6, 7, 10, LG Optimus, Laptop, Nokia Lumia 520 and N9, Samsung Galaxy Note 2 and 3, Samsung Galaxy S3 and S4.
  • Network simulation (GPRS, 3G, 4G, DSL, WiFi).
  • Switch between Landscape and Portrait mode.


3 AppDemoStore's Web App Online Simulator


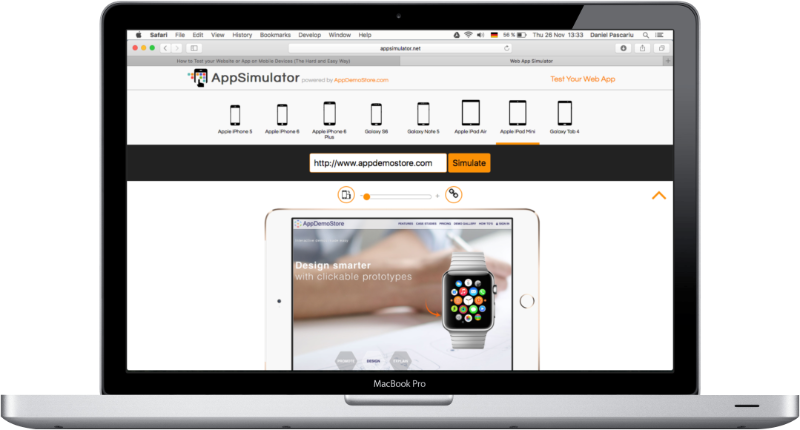
Although Chrome and Safari's testing features work great, they are missing the possibility to share a certain testing scenario with your colleagues. For example, if you find some issue in the way a website or web app displays on the iPhone in landscape-mode, you might want to share it with the responsible team. Our Web App Online Simulator allows you to do this.

Advantages of the Web App Online Simulator compared to Chrome and Safari:

  • Can be accessed from the browser with a simple link: Web App Online Simulator.
  • It's easy to use (just select a device, type your URL and done).
  • You can test your website or web app on a variety of mainstream devices.
  • You can easily switch between Landscape and Portrait mode.
  • You can easily share a certain scenario (URL + device) with your colleagues via a generated URL.

Next time you need to test your new web app or website on a mobile device you don't have, give Web App Online Simulator a try.

January 27, 2016

HOW TO: Demo your Blackberry App in the Browser

Show your Blackberry App in style

This article explains how to easily create a clickable demo or tutorial of a Blackberry app, to be used for promotion or knowledge transfer. The method proposed here is easy and fast, requires no technical skills and it is based on app screenshots. The result is an HTML-based app demo that can be embedded in a website or blog, installed on mobile devices or used in presentations.

1Decide for the scenario you want to show in the demo

One of the best scenarios is showing your potential users how the app solves one of their problems.

2Take screenshots of this scenario, screen by screen

When you are on a screen that you want to capture, press and hold both the volume up and volume down keys at the same time for a few seconds. When you hear a camera shutter sound effect, the screenshot is ready.

3Sign up to www.AppDemoStore.com

You can sign up from your desktop or mobile device. Once signed in, you will be directed to "My Demos" page.

4Create a new demo and Upload the app screenshots to it

In the section "My Demos", click the "Create Demo" button. Select a Blackberry frame (you find some of the latest Blackberry frames such as Classic, Q10 and Z10 in the category Phones —> More). The frame will be visible when the demo is viewed on a computer and not visible when viewed on a mobile device. The frame can be changed later.

To upload the screenshots click the button "Upload Screenshots" and select the files from your disk. Multiple file upload is possible, but you can upload a maximum of 10 screenshots at once. To upload more screenshots, just use the button "Upload Screenshots" several times.

Scrollable Screens: To create scrollable screens, just upload a long image and then set its property "Image Layout" to "scroll". More details here.

5Add interaction, animations and annotations.
  • Use the "Hotspot" control to add interaction between your screenshots. You can choose the transition effect between screens (slide up/down, fade). More details here.
  • Use the "Textbox", "Callout" and "Link" controls to add annotations, explanations, auto-typing and links.
  • Use the "Timer" control to simulate loading effects or show a screen for a limited time (e.g. splash screen).
  • Use the "Arrow" control to add customizable arrows. More details here.
  • Use the "iFrame" control to embed webpages in your demo.
  • Use the "Image" control to add small images on top of the screenshots.
  • Use the "Video" control to embed a YouTube video or a video stored on a server. More details here.
  • Use the "Sound" control to upload audio files or provide a text to be spoken with our Text-to-Speech functionality. More details here.
  • Use the "User Input" control to let users type information into a field that is carried over to the next screens. More details here.


The final demo or tutorial is HTML-based and runs in any desktop or mobile browser.


Common use cases for your app demo or tutorial
  • Share the link to your demo via Email or social networks.
  • Embed demo in your website or HTML email.
  • Embed the demo into your Facebook Page. Learn how to do this here.
  • Embed demo in your app. Learn how to do this here.
  • Download your demo as an HTML, ZIP or APK or PDF.
  • Capture leads and feedback with your demo.
  • Get in-depth demo analytics such as where did user click, interaction flow, exit screens, etc. More details here.
  • Use it as a starting point for generating a demo video for your app. More details here.