Spread the word
Having developed and published a great iPhone/iPad App is not enough. If you want to sell it to a lot of people and earn good money, you will have to promote it. Blogging, tweeting, Facebook-ing, emailing, etc. are a great way to spread the word. But how do you differentiate your app in the big pool of great apps?
A simple yet effective way to do this is to include an interactive demo in your posts and articles, so that people can experience your app, see how it works and "connect" to it. This way, they are more likely to buy your app.
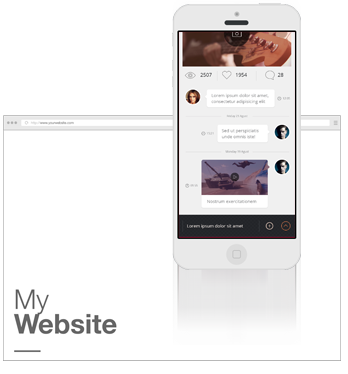
This guide shows you how to create an online interactive demo of your app - like the one on right-hand side - in just a couple of minutes, for free. Your demo will be interactive, guided, online, easy to embed in your website or blog, and will run in the browser or on iPhone/iPad. So, the perfect tool to promote your app!1 Make up your mind about the scenario you want to demo
One of the best selling scenario is showing your potential users how your app solves one of their problems.
2 Take screenshots of this scenario, screen by screen
When you are on a screen that you want to capture, press and hold the Home button and then press the Power/Sleep button. Your screenshots will then appear in your photo gallery on your iPhone/iPad. Alternatively, you can take screenshots from the iPhone Simulator.
3 Sign up to www.AppDemoStore.com
You can sign in from your desktop or mobile device. Once signed in, you will be directed to "My Demos" page.
4 Create a new demo and Upload your screenshots to it
In the section "My Demos", click the "Create Demo" button. Select an iPhone/iPad frame from the gallery (iPhone 6, iPhone 6 Plus, iPad Pro, iPad Mini or even older frames). The frame will be visible when the demo is viewed on a computer and not visible when viewed on a mobile device. The frame can be changed later.
Upload your screenshots to your demo by clicking the button "Upload Screenshots" and selecting the files from your disk. Multiple file upload is possible, but you can upload a maximum of 10 screenshots at once. To upload more screenshots, just use the button "Upload Screenshots" several times.
Scrollable Screens: To create scrollable screens, just upload a long image and then set its property "Image Layout" to "scroll". More details here.
5 Add interaction, animations and annotations.
- Use the "Hotspot" control to add interaction between your screenshots. You can choose the transition effect between screens (slide up/down, fade). More details here.
- Use the "Textbox", "Callout" and "Link" controls to add annotations, explanations, auto-typing and links.
- Use the "Timer" control to simulate loading effects or show a screen for a limited time (e.g. splash screen).
- Use the "Arrow" control to add customizable arrows. More details here.
- Use the "iFrame" control to embed webpages in your demo.
- Use the "Image" control to add small images on top of the screenshots.
- Use the "Video" control to embed a YouTube video or a video stored on a server. More details here.
- Use the "Sound" control to upload audio files or provide a text to be spoken with our Text-to-Speech functionality. More details here.
- Use the "User Input" control to let users type information into a field that is carried over to the next screens. More details here.
Common use cases for using your demo
- Share the link to your demo via Email or social networks.
- Embed demo in your website or HTML email.
- Embed the demo into your Facebook Page. Learn how to do this here.
- Embed demo in your app. Learn how to do this here.
- Download your demo as an HTML, ZIP or APK or PDF.
- Capture leads and feedback with your demo.
- Get in-depth demo analytics such as where did user click, interaction flow, exit screens, etc. More details here.
- Use it as a starting point for generating a demo video for your app. More details here.