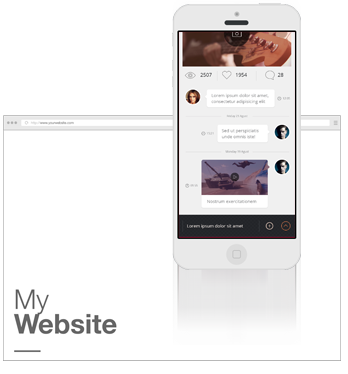
A click-through guide for a mobile app has the role to reveal the key functionality of that app to users and show them how to use it.
Some will argue that people should be able to figure out how an app works intuitively, just by looking at it, but click-through guides are becoming an increasingly popular marketing strategy as apps become more complex. In the same time, even in the case of relatively simple apps, users can benefit immensely from the ability to experience a straightforward interactive guide of an app right their browser, without the need to install it on their mobile device.
Mobile app developers are well aware of the importance of a landing page for app marketing. Including a click-through guide in your app web site or landing page is really easy and your users are going to be grateful.
This article explains how to create an interactive click-through guide like the one for the Evernote app embedded in this page.
1 Define the scenario you want to show
You can either show an overview of a few key features of your app or go for a specific use case showing users how to perform one particular task using the app.
2 Take screenshots
A click-through guide which shows people how to use your app needs to be as realistic as possible. So we'll use screenshots taken directly from apps running on mobile devices. As an alternative, you can also use app images generated from your design tool.
On iPhone and iPad, when you are on a screen that you want to capture, press and hold the Home button and then press the Power/Sleep button. Your screenshots will then appear in the Photo Gallery app. To find out how to take screenshots on other devices check this article.
3 Sign up to www.AppDemoStore.com
You can try our service at AppDemoStore for free - so go on an create an account.
You can sign in from your desktop or mobile device. Once signed in, you will be directed to "My Demos" page.
4 Create a new demo and upload your screenshots
On My Demos page, click the Create Demo button. Select a device frame from the gallery (you can choose from a variety of iPhone, iPad and Android phones and tablets). The frame will be visible when the demo is viewed on a computer and will be hidden when viewed on a mobile device. The frame can be changed later.
Upload your screenshots to by clicking the Upload Screenshots button and selecting the image files from your disk.
Scrollable Screens: To create scrollable screens, just upload a long image and then set its property "Image Layout" to "scroll". More details here.
5 Add interaction, animations and annotations.
Now it's time to bring the still images to life and make your guide clickable and interactive.- Use the Hotspot control to add interaction between your screenshots. You can choose the transition effect between screens (slide up/down, fade). More details here.
- Use the Textbox, Callout and Link controls to add annotations, explanations, auto-typing and links.
- Use the Timer control to simulate loading effects or show a screen for a limited time (e.g. splash screen).
- Use the Arrow control to add customizable arrows. More details here.
- Use the iFrame control to embed webpages in your demo.
- Use the Image control to add small images on top of the screenshots.
- Use the Video control to embed a YouTube video or a video stored on a server. More details here.
- Use the Sound control to upload audio files or provide a text to be spoken with our Text-to-Speech functionality. More details here.
- Use the User Input control to let users type information into a field that is carried over to the next screens. More details here.

Common use cases for using your click-through guide
- Share the link to your guide via Email or social networks.
- Embed the guide into your website or app landing page.
- Embed the guide into your Facebook Page. Learn how to do this here.
- Embed the guide in your app. Learn how to do this here.
- Download your guide as an HTML, ZIP or APK or PDF.
- Capture leads and feedback with your guide.
- Get in-depth analytics such as where did user click, interaction flow, exit screens, etc. More details here.
- Use it as a starting point for generating an video guide for your app. More details here.