In this tutorial you will learn how to add a screenshot to a smartphone phone frame.
Some notes before we start:
Let's get started !
1 Step 1
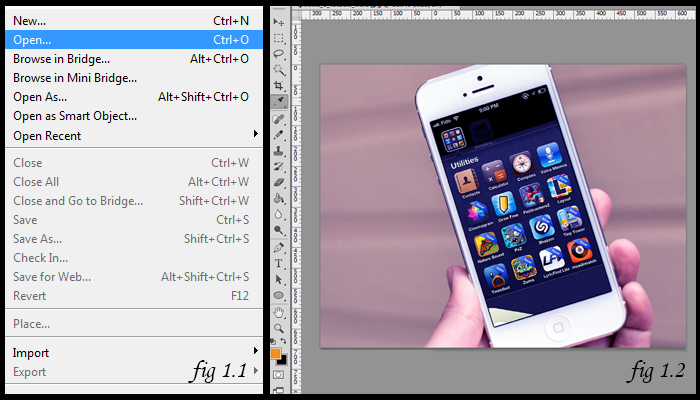
Open your Adobe Photoshop CS6. From the top menu, select File then go to Open. Choose your phone frame and click on Ok or hit Return.
2 Step 2
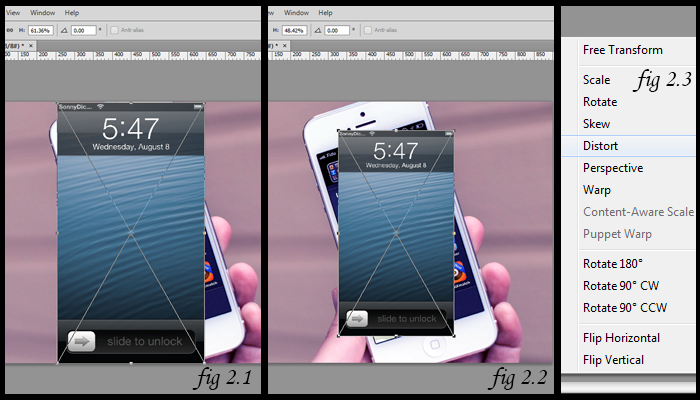
Use your explorer (My Computer, Finder etc) to navigate to the location of your screenshot. Drag and drop it in Photoshop, in the center of the frame. You should obtain a similar result like we did in fig. 2.1. Grab a corner, hold Shift and drag with your mouse in order to make the screenshot smaller. You can also move the image around to position it. The objective is to see all 4 corners of the phone frame, like in fig 2.2. Next, right click on the screenshot and choose 'Distort'.
3 Step 3
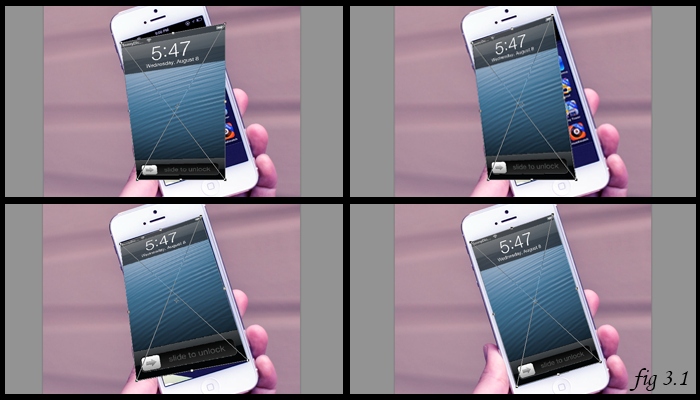
All you have to do now is click & hold on each corner individually and place it in its position. The fig 3.1 shows how the transformation should look at each step. After you're done, hit Return.
4 Step 4
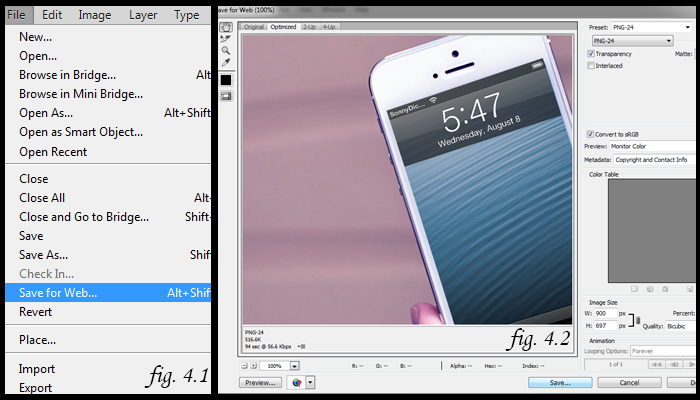
Now it's time to save your image. Go to File and choose 'Save for Web...' Select what type you image you want (JPG, PNG or GIF) and click on Save. Choose the location and you're done. Fig 4.1 shows how you should do.
! No-Photoshop Alternative
You can easily place your screenshot to a mobile device or computer frame with just one click using PicApp.net.